Champion RN14YC Spark Plug Replacement: Step-by-Step Guide
Learn to diagnose and replace the Champion RN14YC spark plug with confidence. This practical guide covers safety, tooling, step-by-step instructions, tips, and troubleshooting for DIYers and car owners.

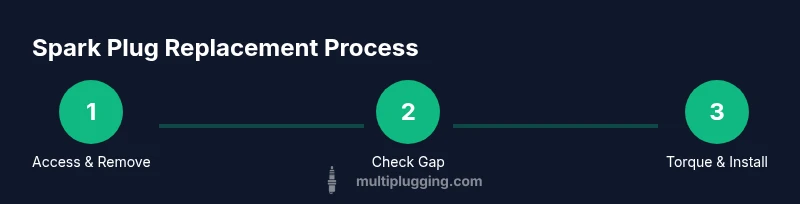
With this guide, you’ll diagnose and replace a champion rn14yc spark plug in compatible engines. You’ll need basic hand tools, a spark plug socket, a torque wrench, and a gap gauge. Steps include safely disconnecting ignition, removing the old plug, inspecting the seat, checking the gap on a replacement, installing the new plug, tightening to spec, and testing the engine after startup.
What the Champion RN14YC is and when to replace it
The Champion RN14YC is a common spark plug used in many small engines and outdoor power equipment. It’s designed to provide reliable ignition under typical operating conditions. According to MultiPlugging, keeping this plug in good condition helps maintain starting reliability, smooth acceleration, and fuel efficiency. Replace it when you notice signs of wear such as fouling, misfires, rough idle, or difficult starts, especially after prolonged use in dirty or high-carbon environments. Before you buy, verify your engine spec to ensure RN14YC is the correct heat range and thread size for your model, since mismatched plugs can cause poor performance or damage. This framework applies whether you’re servicing a lawn mower, generator, snow blower, or small motorcycle engine that uses a RN14YC-type plug.
Safety basics you should never skip
Safety is your first step. Always work in a well-ventilated, cool environment and wear eye protection. Disconnect the battery or ignition system when working near electrical components to avoid shocks or accidental starts. Keep a neat, organized workspace to prevent dropping parts into the engine bay. If you’re not sure about the plug’s fit, consult the engine’s service manual before disassembly. According to MultiPlugging, cautious handling reduces the risk of cross-threading and damaged seals, which saves time and money in the long run.
Engine compatibility and selecting the right plug
Not all engines use the RN14YC; some require different heat ranges or thread sizes. The replacement strategy hinges on matching thread diameter, reach, heat range, and gap specification to the engine manufacturer’s guidance. If your manual lists RN14YC as a compatible option, you still must confirm the exact gap and torque values. Keep in mind that some engines benefit from anti-seize compounds on the threads (only if recommended by the manufacturer). This section leans on general best practices and should be adapted to your specific model.
Gap, heat range, and torque fundamentals you should know
The ignition performance hinges on three factors: heat range (how hot or cold the plug runs), the gap (distance between the center and ground electrodes), and the torque (tightness when installed). Use the engine’s spec as the ultimate authority. If the spec isn’t accessible, use a reputable reference that shows the recommended gap for RN14YC-type plugs in similar engines. Tighten to the manufacturer’s torque specification to avoid loose seating or thread damage, and avoid over-tightening which can crack the insulator.
Accessing and removing the old plug safely
Access varies by engine layout. Begin by removing any obstacles over the cylinder head or cover to reach the plug well. Remove the ignition coil boot or wire connector carefully by pulling the boot, not the wire. Use a spark plug socket with a universal joint for tight spaces. Turn counterclockwise to loosen, then lift the old plug straight out. If it’s stubborn, apply a small amount of penetrating oil and wait a few minutes before reattempting. Document any issues you encounter for future reference.
Inspecting the old plug and seat condition
Inspect the removed plug for fouling, oil on insulator, or worn electrode edges. Fouling patterns can indicate fuel mixture problems or oil leaks. Examine the plug seat on the cylinder head for carbon buildup or damage. If the seat shows wear or cross-threading signs, plan to repair or replace components accordingly. Even if the old plug looks okay, use this moment to verify that the gasket and sealing surface are clean before installing a new plug.
Gap-check and installing the new RN14YC-like plug
Compare the replacement plug’s recommended gap to the engine spec. If a gap tool is needed, set the gap with precision and recheck before installation. Apply a small amount of anti-seize only if your manual or manufacturer recommends it; otherwise, skip. Thread the new plug by hand to avoid cross-threading, then tighten to the recommended torque with a torque wrench. A final snug turn is typically enough, but always follow the official spec. Reinstall the ignition boot securely and route wires properly.
Post-install startup test and immediate checks
Reconnect any components removed for access and reconnect the battery if you disconnected it. Start the engine and listen for a smooth idle and consistent firing. Check for misfires, smoke, or unusual noises. If the engine runs rough or the check-engine light appears, re-check the plug seating, gap, and wiring. Document the results and schedule a routine check if symptoms persist.
Maintenance tips to extend spark plug life
Regularly inspect plugs during routine maintenance, and replace them on the schedule suggested by the manufacturer or after heavy use. Keep the area around the plug clean to prevent carbon buildup. Use high-quality plugs with the correct heat range, and avoid applying excessive force during installation. Proper air and fuel system maintenance supports longer plug life and better engine performance.
Tools & Materials
- Spark plug socket with rubber insert(3/8" or 1/2" drive; fits RN14YC or equivalent)
- Torque wrench(For correct seating without stripping threads)
- Gap tool or feeler gauge(Used to verify plug gap against spec)
- Replacement spark plug (RN14YC or equivalent)(Check heat range and thread size for your engine)
- Dielectric grease (optional)(Used on boot contact area if recommended)
- Anti-seize compound (optional)(Only if specified by engine manufacturer)
- Rag or brush(Clean the seat and surrounding area before installing)
- Safety glasses(Protect eyes from debris and splashes)
- Mechanic gloves(Grip and protect hands during removal/installation)
- Owner’s manual or engine service guide(Verify model-specific specs and procedures)
Steps
Estimated time: 30-45 minutes
- 1
Power down and locate the spark plug
Turn off the engine and remove the key or switch. If necessary, disconnect the battery negative to reduce risk. Locate the spark plug well and identify the boot that covers the plug.
Tip: Allow the engine to cool before touching - hot metal can cause burns. - 2
Disconnect the ignition coil or boot
Carefully twist and pull the boot away from the plug. Do not yank on the wire. Label or note which wire/coil corresponds to which plug if you have multiple cylinders.
Tip: Use a small amount of dielectric grease on the boot contact if recommended by the manual. - 3
Remove the old plug with a spark plug socket
Attach the socket to a ratchet and loosen the plug by turning counterclockwise. Keep the plug straight to avoid damaging the threads.
Tip: A wobble extension helps reach recessed plugs without cross-threading. - 4
Inspect the old plug and seat
Examine the electrode and insulator for fouling, oil, or wear. Check the seat for carbon buildup or damage that could affect sealing.
Tip: Document observations; they can hint at broader engine issues. - 5
Check and set the replacement gap
Compare the replacement plug’s gap to the engine’s specification. Use a gap tool to adjust if needed, then re-measure.
Tip: If you don’t have the exact spec, consult the engine manual or a trusted reference. - 6
Install the new plug and tighten
Thread the new plug by hand to avoid cross-threading, then tighten with a torque wrench to the recommended value. A slight final turn by feel is often enough.
Tip: Never force the plug; overtightening risks thread damage. - 7
Reconnect the ignition boot and route
Push the boot firmly onto the plug until it seats. Ensure any routing clamps are secure and wires are away from hot surfaces.
Tip: Apply dielectric grease only if specified; otherwise, leave dry if the assembly is sealed. - 8
Reconnect the battery and components
Reconnect the negative terminal if you disconnected it and reassemble any covers or shields you removed.
Tip: Double-check connections before starting the engine. - 9
Test engine and confirm operation
Start the engine and listen for a smooth idle. Look for misfires, smoke, or unusual noises. If issues persist, re-check the plug seating and gap.
Tip: Take notes on starting behavior for future maintenance.
FAQ
Is the Champion RN14YC compatible with my engine?
Compatibility depends on the engine model and its manual guidelines. RN14YC is a common option for many small engines, but always verify the heat range and thread size for your specific model.
Check your engine manual to confirm compatibility; RN14YC is common but model-specific specs matter.
What is the proper gap for RN14YC?
The correct gap is defined by the engine’s service manual. If you don’t have the exact specification, refer to the manufacturer’s reference for the recommended gap.
Refer to your engine manual for the exact gap; use a gap tool to set it precisely.
Can I reuse a spark plug after cleaning?
Cleaning a fouled plug is not reliable for engine performance. It’s generally better to replace with a new plug that matches your engine’s spec.
Usually, replace a fouled plug rather than trying to reuse it.
Do I need to disconnect the battery when replacing a spark plug?
If you’re working near electrical circuits, disconnect the battery or ignition system to prevent shocks or accidental starts.
Yes, disconnect the battery or ignition system for safety.
How often should spark plugs be replaced?
Follow your engine manufacturer’s maintenance interval. In harsh environments or with poor fuel, more frequent checks may be needed.
Check the manual for intervals and adjust if you operate in tough conditions.
What if the engine won’t start after replacing the plug?
Recheck the plug seating, gap, and boot connection. Verify no ignition or fuel system issues interfere with starting.
If it won’t start, check seating and gaps, then inspect ignition wiring.
Watch Video
Main Points
- Verify compatibility before replacement.
- Match gap and torque to manufacturer specs.
- Inspect seat and insulator for fouling.
- Install and torque correctly to avoid leaks.
- Test engine after replacement and document results.