Can You Fix Spark Plugs Yourself? A DIY Guide for Beginners
Learn how to diagnose, replace, and optimize spark plugs at home with practical steps, essential tools, safety tips, and troubleshooting guidance from MultiPlugging.

Yes—most common spark plug issues can be diagnosed, replaced, and tested at home by someone comfortable with basic tools. This guide covers what you’ll fix, the exact tools you’ll need, safety steps, and a clear step-by-step process. You’ll learn when DIY is appropriate and when it’s smarter to call a pro, so you protect your engine while saving time and money.
Can you fix spark plugs yourself? What this guide covers
Yes, you can fix spark plugs yourself for many engine scenarios, especially if you’re comfortable with basic hand tools and car maintenance. This guide walks you through diagnosing common problems, choosing the right plug, and performing a safe replacement. You’ll learn how to identify fouling, misfires, or worn electrodes, how to verify your engine’s spark plug type and heat range, and how to avoid common mistakes that lead to damage or leaks. We’ll cover the steps, the required tools, and best practices from MultiPlugging to help you complete a reliable job at home. We’ll also discuss when DIY is appropriate and when professional service is a smarter choice, so you can make an informed decision that protects your engine and your time. Plan your work: set aside a clean workspace, good lighting, and a bit of patience. This knowledge lays the groundwork for dependable home maintenance that keeps your engine running smoothly.
Safety and preparation
Before you touch anything, prioritize safety. Disconnect the negative battery cable to prevent accidental shorts, and allow the engine to cool completely to avoid burns. Wear eye protection and gloves, tie back long hair, and remove any loose jewelry. Work in a well-ventilated area and use a dedicated workspace to avoid mixed fasteners. Have a labeled tray for old plugs and a spotter to remind you of where each wire belongs. By preparing properly, you reduce the risk of damaging the engine or injuring yourself. Always consult your vehicle’s manual for model-specific cautions and torque specs. A calm, methodical approach reduces mistakes and makes the job faster the next time you do it.
Spark plug basics you should know
Spark plugs come in different heat ranges and gaps, designed to work with a specific engine design. The wrong plug type can cause misfires, reduced fuel economy, or hard starts. When fixing plugs yourself, confirm the exact part number for your engine, the recommended gaps, and the correct torque range. Many engines use a standard ceramic-insulated plug with a metal shell, but performance vehicles may use iridium or platinum electrodes for longevity. Understanding these basics helps you select the right plug and avoid wasted parts. Also, learn how fouling—carbon build-up, oil, or fuel deposits—differs from mechanical wear. Recognizing the signs early allows you to plan replacement before the problem escalates and causes engine damage. Always verify compatibility with the maker’s specs before purchasing.
Tools, parts, and planning
As you prepare to fix spark plugs yourself, assemble the essential tools: a spark plug socket with rubber insert, a ratchet, an extension, a torque wrench, and a gap gauge. You’ll also need new plugs of the correct heat range and voltage, anti-seize lubricant (optional but useful for manual threads), and protective gloves. Plan access: some engines require removing covers, air intake tubing, or coil-on-plug modules. Check the service manual for the exact plug type, gap specification, and torque setting. Label any electrical connections to avoid mix-ups and gather a clean workspace to prevent dropping parts. With the right tools and a solid plan, replacement becomes a straightforward maintenance task rather than a mystery.
Common mistakes and how to avoid them
A few errors can turn a simple DIY plug replacement into a headache. Common pitfalls include cross-threading the plug, over-tightening the shell, or failing to gap the plug to the manufacturer’s specification. Don’t reuse old gaskets or overhear wires that crack under pressure; replace worn boots and wires if they show cracks or stiffness. Avoid ignoring gaps and misfiring symptoms by verifying the difference between heat range and gap when you install the new plug. Keep plugs in a clean tray and label wires to prevent misplacement. Finally, never work on a hot engine with bare hands—allow cooling and wear protective gloves. By thinking through each step before you touch it, you’ll minimize problems and maximize reliability.
Maintenance tips and troubleshooting after replacement
After finishing, test the system by starting the engine in a safe, ventilated area and listening for smooth idle. If the engine misfires or has rough performance, recheck the gap and torque, inspect the ignition wires, and confirm the plug seating. Periodically inspect your plugs for signs of fouling, oil leaks, or deposits. Maintain a log of service dates and part types to simplify future replacements and ensure consistent performance. If the check-engine light remains on after replacement, run a diagnostic or seek professional help to rule out ignition coil or sensor issues that can mimic plug problems. With consistent care, you’ll prolong plug life and avoid surprise failures.
Tools & Materials
- Spark plug socket with rubber insert(3/8 in drive, long reach; fits most plugs)
- Ratchet wrench(Medium length for maneuverability)
- Torque wrench(To manufacturer torque specification)
- Extension bar(Useful for tight access areas)
- New spark plugs (correct type and gap)(Check heat range and reach for your engine)
- Gap gauge / feeler gauge(Set plug gap to listed spec)
- Anti-seize lubricant(Optional; helps with future removal)
- Safety glasses(Protect eyes from debris)
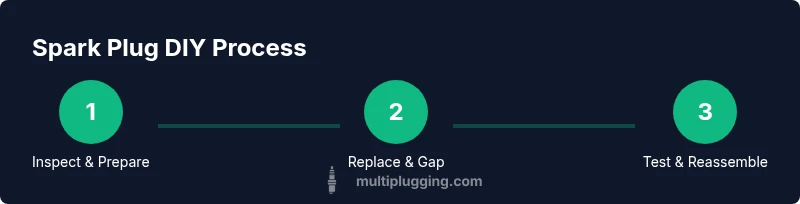
Steps
Estimated time: 60-90 minutes
- 1
Prepare and locate spark plugs
Power down the vehicle and disconnect the negative battery. Let the engine cool completely, then locate the spark plug wires or coil packs for your engine layout. Label connectors if needed and clear a clean workspace.
Tip: Having a labeled setup reduces misplacement and cross-wiring during reassembly. - 2
Access and remove old plugs
Carefully remove the ignition coil boot or wire, depending on your engine design. Use the correct plug socket to loosen and extract the old plug straight, avoiding side loading on the ceramic insulator.
Tip: Twist the boot gently to avoid tearing the rubber; do not yank. - 3
Check gap and condition
Inspect the gap of each old plug with a gap gauge if you intend to reuse, or skip to installing new plugs if replacements are planned. Compare wear patterns and any fouling signs to determine if replacement is warranted.
Tip: Replace if any electrode is worn or if deposits are extensive. - 4
Install new plugs
Thread the new plug in by hand to prevent cross-threading, then snug with the socket. If you’re using new plugs with anti-seize, apply sparingly. Maintain the manufacturer-recommended torque.
Tip: Avoid forcing plugs into worn threads; cross-threading leads to leaks and damage. - 5
Reconnect and reseal
Reattach the ignition wire or coil boot, ensuring a snug fit. Reassemble any components you removed and check that no tools remain in the engine bay.
Tip: Double-check the boot seating to prevent misfires. - 6
Test and verify
Start the engine and listen for a smooth idle. If misfires persist, re-check gaps and torques, and inspect spark plug wires for wear. A quick engine diagnostic can verify proper operation.
Tip: Take a short test drive and monitor for unusual sounds or performance issues.
FAQ
Can you tell if a spark plug needs replacement just by looking at it?
Yes. Fouled, oil-soaked, cracked, or heavily worn electrodes indicate replacement is needed. Smooth porcelain and a clean electrode are signs of a healthy plug.
Look for visible wear, deposits, or damage to decide if replacement is needed.
Do I need to gap the spark plugs after removing them?
If you’re installing pre-gapped plugs from the factory, you may not need to gap them again. Always verify the gap spec in your vehicle manual before final installation.
Check the gap spec and adjust only if needed when you install new plugs.
What tools are essential for a DIY plug replacement?
A spark plug socket with a rubber insert, a ratchet, an extension, a torque wrench, a gap gauge, and new plugs. Having gloves and eye protection is also important.
You’ll need the right socket, a torque wrench, and a gap gauge to do it right.
What if I strip a plug well thread?
Stop immediately. Damaged threads require professional repair, such as heli-coiling or cylinder head service.
If threads are damaged, don’t push ahead—professional help is advised.
Can I reuse old ignition wires or boots?
Worn or cracked wires and boots should be replaced to prevent misfires and poor performance.
Worn wires can cause misfires; better to replace them when replacing plugs.
Is DIY plug replacement safe on modern cars?
Most cars allow DIY plug replacement, but some engines have restricted access or special procedures. Always consult the service manual.
Check your manual—some engines require special tools or procedures.
Watch Video
Main Points
- Identify whether DIY is appropriate based on access and tool availability.
- Use the correct plug type, gap, and torque specs for your engine.
- Procedure emphasizes safety and labeling to avoid miswiring.
- Testing after replacement confirms the repair was successful.
- Know when to consult a professional to protect your engine.