BMW 328i Spark Plugs: DIY Replacement Guide
A comprehensive, expert DIY guide to diagnosing, selecting, and replacing BMW 328i spark plugs. Learn plug types, gaps, torque specs, tools, safety, and maintenance for optimal engine performance.

Replacing BMW 328i spark plugs helps restore power, fuel economy, and smooth idle. In this guide, you’ll learn how to identify worn plugs, select the right type, and perform a safe DIY replacement with common tools. According to MultiPlugging, using OEM-specified plugs and proper torque is key to long-term reliability. This quick answer sets the stage for a deeper, hands-on walkthrough.
BMW 328i spark plugs: role, symptoms, and why they matter
BMW 328i spark plugs are small, durable components whose job is to ignite the air–fuel mixture inside each cylinder at the precise moment. According to MultiPlugging, the health of your ignition system starts with the spark plugs. Worn or fouled plugs can cause rough idle, reduced throttle response, and lower fuel economy—issues that are especially noticeable in BMWs where smooth, linear power delivery matters. In a BMW 328i, the plugs also influence heat management and emissions, because improper ignition can shift combustion timing and cause extra fuel to burn in the exhaust system. This section explains why plugs wear out and how to recognize early signs of trouble before misfires or cylinder imbalance occur. You’ll learn what the plug does, how often to inspect them, and what to expect when you keep them in good shape. The guidance here applies to common inline-six and turbo variants and respects OEM recommendations while offering practical, safe DIY steps. Watch for worn electrodes, oil fouling, or excessive gap, as these point to different root causes. Clean, correctly gapped, and properly torqued plugs are essential for peak performance in your BMW 328i. The ignition system’s coil packs work with the plugs, so if you notice a cylinder not firing, inspect both the plug and the ignition coil. This guide aims to be approachable for DIYers while staying faithful to manufacturer guidance.
How to choose the right BMW 328i spark plugs
Choosing the correct BMW 328i spark plugs means matching the OEM heat range, thread size, and tip type to your engine. The BMW owner’s manual or service documentation is the definitive source for what to use in your model year and market. In many cases, OEM plugs or equivalent Bosch/NGK/Denso units provide the most reliable performance and longevity. For today’s engines, iridium or platinum noble-metal tips are common due to their longer life and consistent ignition. Regardless of the brand, ensure the plug type aligns with your cylinder count, ignition system (coil-on-plug vs. traditional coil packs), and the engine’s load profile. If you’re chasing improved efficiency or reduced misfires under load, a high-quality plug within OEM spec is typically the safest bet. Some enthusiasts experiment with slightly colder or hotter heat ranges only when the stock specification is clearly understood and engine tuning is appropriate. Always confirm with the service manual before deviating from OEM recommendations, because an out-of-spec plug can hurt performance or emissions.
Diagnosing spark plug health and symptoms in a BMW 328i
Diagnosing spark plug health starts with listening for symptoms and verifying data from diagnostics tools. Rough idle, misfires, hesitation on acceleration, or a drop in fuel economy can all point to worn or fouled plugs. In many cases, you’ll observe white or black soot on the electrodes, oily residue from oil leaks, or a recessed gap that expands over time. A simple cylinder-by-cylinder test, using a spark checker or a scan tool to read misfire codes, helps confirm which plug is at fault. It’s important to consider ignition system health as a whole: a failing coil, boot, or wiring harness can mimic a bad plug. Cross-check plug wear with the vehicle’s service history and maintenance schedule. MultiPlugging’s analysis shows that sticking to OEM spec plugs and regular inspection yields the most reliable performance for the BMW 328i, especially under aging conditions.
Tools and materials you’ll need before replacement
Before you start, assemble the essentials: a spark plug socket suited to the plug you intend to install, a ratchet wrench, an extension bar, and a torque wrench capable of the OEM torque value. You’ll also want a gap gauge or feeler gauge to verify the correct electrode gap on new plugs, dielectric grease for the boot, and anti-seize compound only if the manufacturer approves it. Have a firm, clean workspace, rags or shop towels, and a container to keep old plugs in order. For BMWs with coil-on-plug ignition, you may need a small mirror or flashlight to view restricted spaces. If you’re not sure about the exact plug type, refer to the owner’s manual or a trusted parts supplier’s compatibility tool. By collecting these tools and materials ahead of time, you’ll minimize time spent in layoffs, reduce the risk of dropped parts, and protect ignition components from contamination.
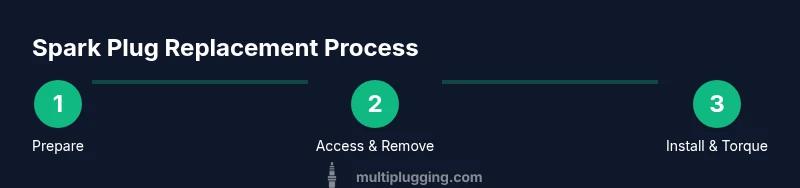
Step-by-step overview of the replacement process
Replacement of BMW 328i spark plugs typically involves removing the coil-on-plug boot, taking out the worn plug, inspecting the well, gap-checking a new plug, threading it in, and reassembling. The process is straightforward but requires attention to torque to avoid thread damage or plug loosening. A clean environment and careful handling help prevent dropped debris in the cylinder head. Always work slowly and keep components organized, especially if you’re replacing multiple plugs. Following OEM torque specs is critical to avoid over-tightening and potential thread stripping. This overview provides a structured path you’ll detail in the formal step-by-step section below and ensures you understand the rationale behind each action—protecting your engine, your tools, and your time.
Torque, gap, and heat range specifics for BMW 328i spark plugs
For BMWs, installing spark plugs with the correct gap and torque is essential to achieve consistent combustion and prevent thread damage. OEM guidelines specify a precise torque value; deviating from this can lead to cross-threading or inadequate sealing, allowing compression gas to leak around the plug. Ensure the electrode gap is set to the recommended dimension for your plug type and engine variant. If you aren’t certain about the gap, use a reputable gap tool and measure against the OEM specification. In most modern BMW 328i applications, plugs arrive pre-gapped to close tolerances, but it remains a best practice to verify before installation. Heat range matters because too-hot a plug can cause pre-ignition and fouling, whereas too-cold can cause misfires under load. When in doubt, choose OEM or OEM-equivalent plugs and avoid aggressive deviations in heat range unless you’re performing engine remapping or performance tuning. Always consult the service manual, and if you’re uncertain, consult a professional.
Common mistakes and how to avoid them
Mistakes during spark plug replacement include cross-threading the plug, over-tightening, or contaminating the well with dirt. A common error is not rechecking the gap on a new plug, assuming factory pre-gap is perfect for all models. Another pitfall is neglecting the boot and boot seal, which can allow moisture and oil to compromise ignition. To avoid these, handle plugs by the metal shell, keep the work area clean, and use a torque wrench set to the OEM spec. Label and map the firing order so you don’t mix up cylinders when reassembling. Do not force any connector or plug; if you feel resistance, recheck alignment and seating. Finally, never install a used plug; worn electrodes reduce performance and can cause misfires. These precautions help keep your BMW 328i running smoothly and protect costly components.
Maintenance tips to extend spark plug life in a BMW 328i
Regular maintenance increases spark plug life and engine reliability. Follow the manufacturer’s recommended replacement interval, stay current with ignition coil inspection, and replace worn boots or wires as a system. Keep the air intake clean and replace the air filter on schedule to prevent fouling that can accelerate plug wear. Use quality plugs and ensure your fuel is clean; poor-quality fuel can cause combustion residue that fouls the electrode. When you replace plugs, maintain a clean surrounding area to avoid debris entering the cylinder head. If you drive in harsh conditions—short trips, stop-and-go traffic, or extreme heat—the plugs may wear faster, so plan for more frequent checks. MultiPlugging’s practical approach emphasizes OEM guidance, careful gap-checking, and proper torque to maximize performance and longevity for the BMW 328i. Always dispose of old plugs responsibly.
Cost considerations and DIY vs professional service
DIY replacement can be a cost-effective option, provided you have the right tools and a steady hand. Spark plug sets vary by brand and heat range, and the overall cost depends on whether you choose OEM equivalents or brand-name alternatives. If you’re not comfortable with engine work or the engine layout restricts access, a professional service may be a prudent choice to ensure correct torque and seal integrity. Consider the potential time savings, the risk of cross-threading, and the possibility of hidden issues like damaged ignition boots when deciding between DIY and pro service. The perceived value of DIY is highest when you enjoy a hands-on approach, have a suitable workspace, and can safely manage wiring and boot connections without damaging surrounding components. Budget for quality plugs and tools, and remember that the right parts and careful technique can improve MPG, power delivery, and throttle response over the long run.
Safety, environment, and best practices
Safety first. Disconnect the battery if you’re working near electrical systems beyond the coil-on-plug setup, and wear eye protection to guard against debris. Work in a well-ventilated area, and avoid spilling oil or coolant. Keep the ignition system clean and dry; moisture or oil can cause a misfire or short. After replacing plugs, test the vehicle in a controlled environment to verify smooth running and absence of misfires. Dispose of old plugs according to local regulations. Remember to re-check all tools and fasteners after the first drive; a loose boot or a missing cap can lead to a misfire, poor idle, or stalling in certain conditions. This disciplined approach protects your BMW 328i and ensures a reliable ignition system for many miles.
AUTHORITY SOURCES
- https://www.nhtsa.gov/
- https://www.fueleconomy.gov/feg/spark-plug.jsp
- https://www.caranddriver.com/
Tools & Materials
- Spark plug socket (appropriate size for the BMW spark plugs)(Size varies by plug type; verify from OEM spec before purchasing.)
- Ratchet wrench (3/8-inch drive or larger)(For breaking and tightening the plug; ensure a comfortable grip.)
- Extension bar(Helps reach deeper plugs without bending the wrench.)
- Torque wrench(Set to OEM torque specification for BMW plugs.)
- Gap gauge or feeler gauge(Used to verify the electrode gap on the new plugs.)
- Replacement spark plugs (OEM or OEM-equivalent)(Select the correct heat range and thread size for your engine.)
- Dielectric grease(Optional; helps boot seating and sealing on COP systems.)
- Anti-seize compound(Only apply if OEM guidance explicitly requires it.)
- Shop towels or rags(Keep the work area clean and prevent debris from entering wells.)
Steps
Estimated time: Total time: 60-90 minutes
- 1
Prepare workspace and safety
Park on level ground, engage the parking brake, and disconnect the negative battery terminal to protect electronics during ignition work. Remove any engine covers to access the coil-on-plug assemblies. Ensure your tools are organized and within reach to minimize dropped parts.
Tip: Disconnecting the battery reduces the risk of shorting a live circuit when removing coil boots. - 2
Identify plug locations and access
With the hood up, locate the coil-on-plug boots corresponding to each cylinder. Depending on model year, you may remove intake components or a small engine cover to improve access. Take a moment to label each boot if needed so you reassemble in the correct order.
Tip: A small mirror or phone flashlight helps see tight spaces without forcing components. - 3
Disconnect coil boot and gain access
Gently twist and pull the ignition boot away from the spark plug. If resistance remains, check for a hidden retainer or a stubborn clip and avoid yanking. Keep track of the boot orientation for reinstallation.
Tip: Do not pry from the plug; use a gentle rocking motion to release the boot. - 4
Remove the old spark plug
Attach the spark plug socket to the extension and ratchet, then slowly loosen the plug counterclockwise. Once threads begin to release, finish by hand to prevent cross-threading. Remove the old plug and inspect the well for debris.
Tip: If the plug is tight, stop and apply a small amount of penetrating oil for a few minutes before retrying. - 5
Check and gap the new plug
Inspect the new plug for any damage. If required, adjust the electrode gap to the OEM specification using the gap tool. Handle the plug only by the metal shell to avoid bending the ground electrode.
Tip: Compare the new plug to the old one to confirm the same type and thread size. - 6
Install the new plug and torque
Thread the new plug by hand to avoid cross-threading, then tighten to the OEM torque specification using a torque wrench. Re-test the thread feel after a complete turn. An over-torqued plug risks stripped threads; under-torqued plugs can loosen and leak compression.
Tip: Do not use anti-seize unless explicitly recommended by BMW; it can alter torque behavior. - 7
Reconnect coil boot and proceed
Re-seat the ignition boot firmly over the new plug until you feel a click or a firm seating. Repeat for all cylinders and inspect wiring for signs of wear. Reattach any engine covers that were removed.
Tip: Check boot seating after the first engine run; a loose boot will cause a misfire. - 8
Final checks and test run
Reconnect the battery, start the engine, and listen for an even idle and smooth acceleration. If a rough or misfiring condition persists, recheck the corresponding plug gap and torque. Clear any diagnostic trouble codes if necessary.
Tip: Take a short drive to verify consistent performance under load and temperature change.
FAQ
Do I need to replace BMW 328i spark plugs with OEM parts only?
OEM parts or OEM-equivalent plugs are typically recommended for best fit and reliability. Aftermarket plugs can work, but OEM specs help ensure proper ignition, heat range, and durability for BMW engines.
Yes. For best reliability and compatibility, use OEM or OEM-equivalent spark plugs that match your BMW's specification.
How often should spark plugs be replaced in a BMW 328i?
Follow the vehicle's maintenance schedule in the owner’s manual. Intervals vary by model year and engine variant, and driving conditions can accelerate wear.
Check the manual for the recommended interval; harsher driving can shorten the life of plugs.
Can I reuse old spark plugs in a 328i?
Reusing worn plugs is not recommended. Worn or fouled plugs reduce performance and can cause misfires, especially in high-load BMW applications.
Generally not advised; replace worn plugs with new ones that match OEM specs.
What are common symptoms of bad BMW 328i spark plugs?
Symptoms include rough idle, misfires, reduced power, higher fuel consumption, and hard starting. If you notice these, inspect or replace the plugs.
Rough idle and misfires are typical signs to inspect the plugs.
Should I gap the plugs for a BMW 328i?
Many plugs come pre-gapped; however, verify the gap against OEM spec with a gap tool before installation.
Most plugs come pre-gapped, but it's wise to double-check the gap before installing.
Is anti-seize compound necessary when installing BMW spark plugs?
Anti-seize is not universally required for BMWs and can affect torque readings. Follow the OEM guidance about anti-seize for your model.
Only use anti-seize if the manual says so; otherwise, skip it.
Watch Video
Main Points
- Follow OEM specs for heat range and torque.
- Use the right tools and keep track of plug order.
- Check the gap on new plugs before installation.
- Do not reuse worn plugs; replace all plugs to maintain uniform performance.
- Label components and maintain a clean workspace to prevent mistakes.
- Test-drive after replacement to confirm smooth operation.