AC Delco Spark Plug Wires: Replacement & Care Guide
Learn to inspect, replace, and maintain AC Delco spark plug wires for reliable ignition. This guide covers compatibility, safety, install steps, and troubleshooting tips.

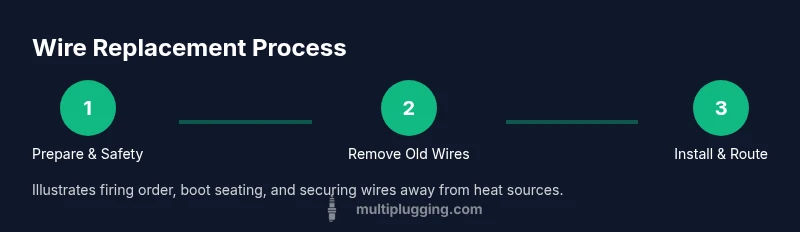
You will learn how to inspect AC Delco spark plug wires, choose the right replacement set, and install them safely. This guide covers identifying wear, matching length and boot types, disconnecting power, and verifying proper seating and routing. Expect step-by-step instructions, safety tips, and basic testing to confirm correct ignition performance.
Understanding AC Delco Spark Plug Wires and Why They Matter
AC Delco spark plug wires are a critical part of the ignition system, carrying high voltage from the ignition coil to each spark plug. Worn or cracked boots, damaged insulation, or corroded connectors can cause misfires, rough idle, reduced fuel efficiency, and hard starting. The integrity of these wires directly influences spark delivery and timing, so inspecting them regularly is a smart DIY habit. According to MultiPlugging, keeping ignition components in good condition preserves engine performance and reduces the chance of disruptive breakdowns. The MultiPlugging team found that aging or poorly matching wires are a common cause of weak starts and hesitation, especially in older vehicles. This makes understanding wire length, boot type, and routing essential for DIYers who want reliable ignition without costly trips to the shop.
Understanding the role of AC Delco spark plug wires helps you spot wear early and plan cost-effective replacements. Look for cracks in the insulation, softened or hardened boots, arcing marks near the boots, and any damage where wiring meets the boots. Even if the engine starts, subtle symptoms like misfires under load or inconsistent idle can point to aging wires. A proactive check is worth the time and can save you from bigger ignition problems down the road.
Compatibility, Length, and Boot Styles
Spark plug wires come in several lengths and boot styles to fit different engines. When shopping for AC Delco spark plug wires, you’ll want to verify three things: length, boot end type (the connector that fits your spark plug), and the connector at the coil or distributor end. Mismatched lengths can cause routing interference, heat exposure, or boot damage. Boot designs vary between straight, 90-degree, and 135-degree configurations, affecting how neatly wires route around engine components. For most DIYers, choosing a wire set that matches the factory length and boot style is the simplest path to a correct fit. If you’re unsure, consult your vehicle’s service manual for the exact firing order and wire routing, then compare it to the replacement kit. Consistent routing helps prevent contact with hot surfaces or moving parts, which can deteriorate insulation over time.
AC Delco’s wire sets are designed to accommodate a wide range of engine configurations. In practice, you’ll often see two main categories: universal-style sets and vehicle-specific kits. Universal sets provide flexibility but require careful matching, while vehicle-specific kits are pre-matched for your engine. For cars with complicated wiring paths, consider a kit that includes advanced boots and heat-resistant jackets. Regardless of choice, ensure the wires are labeled in the correct order and routed away from belts, fans, and exhaust components. This reduces wear and the chance of misfires caused by poor seating or degraded boots.
When selecting a replacement, verify that the set includes boots that seal well against moisture and are compatible with your spark plug type (iridium, platinum, or standard copper cores). Using the right boot material and thickness helps protect against moisture intrusion and arc leakage. Remember that longer doesn’t always mean better; the goal is to match the original length and routing, then secure the wires to prevent movement.
Safety First: Before You Begin
Safety comes first when servicing ignition components. Begin by parking the vehicle on a level surface, turning off the engine, and removing the key. Disconnect the negative battery terminal to prevent any accidental spark while you work. Wear eye protection and gloves to shield against sharp edges and accidental contact with hot engine parts. If you’re working around moving engine accessories, wait until the engine is cool before touching any components. A slow, careful approach minimizes the risk of electric shock and burns.
Before removing any wires, take photos or label the wires in order to preserve firing sequence. Incorrect placement can cause misfires, rough idling, or even damage to the ignition coil. If your vehicle’s service manual recommends a particular sequence (firing order), write it down or tape it near your work area for reference. Finally, keep your workspace organized so you don’t lose track of which boot belongs to which plug.
Tools, Materials, and Vehicle Prep
Having the right tools makes replacement smoother and safer. Gather a clean workspace, a sturdy work light, and the following items: a set of AC Delco spark plug wires of the correct length, a spark plug socket and ratchet, dielectric grease for boot seats, protective gloves, eye protection, and a way to label wires to preserve correct order. If you need to remove adjacent components to access the spark plugs, a small socket set or driver may be required. Keep a container nearby to hold any removed parts so nothing is misplaced. A tidy setup reduces the risk of mishandling wires and helps you stay organized as you work.
Double-check your vehicle’s battery is disconnected before you begin, and ensure you have a clear path to the engine bay. If your engine uses coil-near-plug or distributor-based ignition, the wiring topology may differ slightly; consult your repair manual for unique steps pertaining to your model. With the right materials on hand, you’ll be ready to proceed with confidence.
Inspecting Old Wires and Removing Them
Begin by tracing each wire from the coil/distributor to its corresponding spark plug. Gently twist the boot at the top of the spark plug and pull straight outward with a steady, even motion—avoid yanking or bending the wire aggressively, as this can damage the wire core or the boot. As you remove each wire, label it with its plug location so you can map it to the new set. Inspect each boot and conductor for signs of cracking, corrosion, or arching. If you notice any damage, replace the entire wire set rather than attempting to repair individual wires. A spare boot can be a practical backup if damage is only localized to one connector, but in most cases a full set replacement is safer and more economical in the long run.
If you encounter resistance, stop and check for hidden clips or routing guides that hold wires in place. For stubborn boots, use a plug boot puller or a non-metal tool to avoid piercing the insulation with metal. Staying patient here reduces the risk of tearing boots or damaging the wire itself.
Installing New Wires: Routing, Seating, and Boot Care
Start with the coil/distributor end and work toward the spark plugs, connecting each boot to its matching ignition lead. Push the boot onto the coil/distributor outlet until you hear a gentle click, indicating a secure seat. Then connect the other end to the spark plug, ensuring a snug fit with no side-to-side play. Route the wires away from hot surfaces, moving parts, and sharp edges; secure with cable clips or zip ties as needed to keep them off belts and fans. Apply a small dab of dielectric grease to each boot if recommended by the manufacturer to improve seating and moisture resistance. Avoid crowding or bending the wires tightly, as this can cause insulation wear and arching over time.
Take your time to confirm that each wire sits properly in its channel and is not touching exhaust manifolds or hot components. A neat, organized harness not only looks better but also minimizes the risk of vibration-induced wear. If you replaced a wire that runs near a fuel line or a sensitive sensor, re-check its clearance after everything is reassembled.
Post-Install Testing and Troubleshooting
With the new wires installed, reconnect the battery and start the engine. Listen for a smooth idle and watch for any misfires or stumbling during acceleration. If you notice coughing, backfiring, or a rough idle, re-check boot seating and ensure the firing order is correct. If the engine still hesitates, perform a basic diagnostic check (if you have the tools) for ignition coil or spark plug issues beyond the wires. In some cases, a misfire on a single cylinder points to a faulty replacement wire or a bad boot connection rather than the entire set. If you’re unsure, perform a controlled test drive in a safe environment to assess cold and warm starting behavior and acceleration.
Keep an eye on engine codes and check engine light if applicable. A misfire code might point toward a specific cylinder’s wire path, helping you isolate trouble more quickly. Finally, store your old wires safely in case you need to compare lengths or routing during a future inspection.
Common Mistakes and How to Avoid Them
Common mistakes include mixing up wire order, choosing the wrong length, or not seating boots fully. Double-check firing order before finalizing connections, and avoid bending wires sharply near boots. Another frequent issue is routing wires too close to hot exhaust components or moving parts, which accelerates insulation wear and can cause shorts. Take your time during installation and re-check all connections after the engine is started. If you encounter an unexpected issue, re-inspect systematically—one wire at a time—to locate the root cause without guessing.
Tools & Materials
- AC Delco spark plug wires set(Choose correct length and boot style for your engine)
- Spark plug socket with ratchet(Typically 5/8 inch or 13/16 inch depending on plug size)
- Ratcheting wrench or socket set(For removing any adjacent components if needed)
- Dielectric grease(Apply to boots to improve seating and moisture resistance)
- Safety glasses(Protect eyes from debris and fluids)
- Mechanics gloves(Keep hands protected and clean)
- Boot puller or needle-nose pliers(Optional tool for stubborn boots)
Steps
Estimated time: 60-90 minutes
- 1
Power down and prepare workspace
Park the vehicle on a level surface, set the parking brake, and turn off the engine. Remove the key and disconnect the negative battery terminal to prevent accidental sparks. Gather your tools and ensure you have a clear, well-lit area to work.
Tip: Always disconnect the battery before touching ignition components to minimize shock risk. - 2
Identify correct wires and firing order
Consult your vehicle manual for the exact firing order and wire routing. Label each old wire as you remove it or take a quick photo to reference later. This ensures the new wires go back in the correct order and orientation.
Tip: Label wires with tape, number them, or photograph the routing before removal. - 3
Remove old wires carefully
Starting from the coil/distributor end, gently twist and pull the boot straight off the plug. Do not yank the wire or pull by the wire jacket. Place each removed wire in order to match to the new set.
Tip: If a boot is stubborn, twist slightly while pulling; do not force the boot off. - 4
Inspect and prepare the new wires
Check the new AC Delco wires for the correct length and boot style. If applicable, apply a small amount of dielectric grease to the inner surface of the boots for better seating and moisture resistance. Lay out the wires in firing order next to the engine bay.
Tip: Compare new wires side-by-side with old ones to confirm length and boot orientation. - 5
Install the new wires
Attach the boot to the spark plug first, then connect the opposite end to the coil/distributor. Push each boot until you hear a click indicating full seating. Route wires away from hot surfaces and moving parts, using clips to secure if available.
Tip: Ensure each boot is fully seated to avoid poor contact. - 6
Secure routing and check clearances
Tidy the wire harness, avoiding contact with belts, fans, or exhaust components. Make sure wires have equal distance from heat sources and are not stretched. Recheck all connections before starting the engine.
Tip: Avoid sharing a single clip between multiple wires; use individual clips if possible. - 7
Test start and verify operation
Reconnect the battery and start the engine. Listen for a smooth idle and watch for any misfires or rough running. If issues appear, recheck firing order and boot seating; if unresolved, consult a diagnostic guide or a professional.
Tip: Take a short, safe test drive to assess performance under load.
FAQ
How do I know if my AC Delco spark plug wires are worn?
Look for cracked insulation, hardened boots, arcing marks, or obvious wear at the boot connections. Engine misfires or rough idle can also indicate worn wires. If in doubt, replace the set rather than repairing individual wires.
Worn wires show cracks, hard boots, or arcing marks, and they can cause misfires. If you’re unsure, replace the whole set.
Can I replace wires myself, or should I hire a mechanic?
Replacing spark plug wires is a common DIY task for many car owners with basic tools. If your engine layout is complex or you’re unsure about firing order, consult the service manual or a professional.
Many DIYers replace wires at home, but if your engine is complex, seek professional help.
Do spark plug wires affect fuel economy?
Yes, degraded wires can cause misfires and inefficient ignition, which can waste fuel. Replacing worn wires helps restore proper combustion and fuel efficiency.
Worn wires can cause misfires that waste fuel; replacing them can improve efficiency.
What safety precautions should I take before starting?
Disconnect the negative battery terminal, wear eye protection, and work on a cool engine. Avoid touching hot components and be mindful of moving parts when routing wires.
Disconnect the battery, wear protection, and ensure the engine is cool before you start.
Should I mix brands or stick with AC Delco wires?
Sticking with a single reputable brand that matches your vehicle’s specifications is generally best. Mixing brands can lead to mismatched resistance or boot geometry affecting timing.
It’s best to stay with a matched, reputable brand for your vehicle and avoid mixing brands.
What is the typical lifespan of spark plug wires?
Lifespan varies by driving conditions, heat, and maintenance. If you notice performance issues such as hesitation or misfires, consider replacing the set.
Wires wear out over time due to heat and use; replace them if performance declines.
Watch Video
Main Points
- Replace worn wires promptly to maintain ignition performance
- Match the correct length and boot style for your engine
- Follow the firing order precisely and seat boots fully
- Maintain tidy routing to prevent heat and wear