Spark Plug Champion RJ19LM: DIY Diagnosis, Replacement, and Tuning
Learn to diagnose, gap, and replace spark plug champion RJ19LM with a safe, step-by-step DIY approach. Includes tool lists, torque guidance, post-install checks, and maintenance tips for reliable ignition.

Goal: diagnose, replace, and optimize RJ19LM spark plugs using a safe, step-by-step DIY process. You’ll need basic hand tools, a torque wrench, anti-seize, a spark-plug gap tool, and the RJ19LM plug (or a compatible substitute). This quick path highlights when to replace, how to gap and torque, and how to verify engine performance after installation.
RJ19LM at a glance: compatibility, ignition, and common questions
The RJ19LM spark plug is a widely used option in many light- to mid-duty engines. It’s favored for its solid heat range, reliable ignition, and broad compatibility with a range of makes and models. According to MultiPlugging, understanding the RJ19LM’s role in your engine starts with matching heat range to your operating temperature and confirming physical fit with your cylinder head and threads. In practice, this means verifying thread size, seating depth, and the spark plug’s electrode design against your vehicle’s service manual. With the RJ19LM in hand, you can plan a careful, methodical replacement that minimizes misfires and improves cold starts. This article teaches you to diagnose conditions, prepare properly, and install with correct torque to maximize performance and longevity.
brandMentions:
Tools & Materials
- RJ19LM spark plug(Ensure it is the correct heat range and thread size for your engine.)
- spark-plug socket with 12mm drive(Use a swivel-head if access is tight.)
- ratchet or breaker bar(For leverage in tight spaces.)
- torque wrench(Check vehicle-specific torque spec and apply evenly.)
- gap tool or feeler gauges(Set the electrode gap to the engine’s specification.)
- anti-seize compound (optional)(Apply a thin coat on the threads if the manufacturer allows.)
- coolant/engine-safe wipe cloth(Keep threads clean during removal and installation.)
- safety gloves and eye protection(Protect hands and eyes during disassembly and cleaning.)
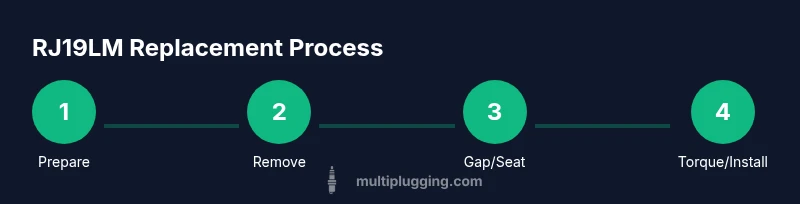
Steps
Estimated time: 60-90 minutes
- 1
Prepare workspace and safety checks
Park on a level surface, cool the engine, and disconnect the negative battery to prevent any shorts or shocks. Remove any engine cover or components shielding the spark plugs to gain clear access. Deburr loose debris around the plug wells before touching any wires.
Tip: Double-check your vehicle's service manual for any model-specific precautions to avoid accidental damage. - 2
Locate the RJ19LM spark plugs
Trace the ignition coil packs or wire harnesses to the spark plugs. Carefully label each plug lead if you’re dealing with a multi-cylinder engine to ensure correct reattachment after replacement.
Tip: Take a quick photo before disconnecting wires to serve as a reference. - 3
Remove the old spark plug
Loosen the plug by turning counterclockwise with the spark-plug socket. Once free, lift the plug straight out to avoid cross-threading the threads in the cylinder head.
Tip: If the plug is stubborn, use a brief, controlled burst of penetrating oil and wait a few minutes before retrying. - 4
Inspect the old plug and examine the cylinder
Check the electrode wear, insulator color, and any signs of fouling or oil on the tip. A healthy plug should show even wear and light tan color; heavy deposits or oil indicate other engine issues that may require further diagnosis.
Tip: Document signs of wear to compare with future plugs and guide maintenance intervals. - 5
Gap and prep the new RJ19LM
Check the gap on the new plug with a gap tool and adjust if necessary to the engine’s specification. Lightly coat the threads with anti-seize if manufacturer guidance allows, then hand-tighten to seat properly before final torquing.
Tip: Avoid over-tightening; cross-threading can ruin the head and require expensive repairs. - 6
Torque the plug to spec
Using a torque wrench, tighten the plug to the manufacturer’s specified torque in a smooth, steady motion. Recheck after a brief back-off and final torque if required by your manual.
Tip: Always torque in a single pass if possible and avoid multi-torque techniques that can unevenly seat the plug. - 7
Reconnect wires and wires routing
Reconnect the ignition coil or spark plug wire boot with a gentle push until seated. Ensure the boot is fully clicked into place and routed away from hot surfaces or moving parts.
Tip: If the boot feels loose, inspect the connector and seating surface for damage before proceeding. - 8
Test the engine and check for leaks or misfires
Reconnect the battery, start the engine, and listen for a smooth idle. Look for any misfires or rough running; if present, recheck plug seating, gap, and ignition wiring.
Tip: A short test drive can reveal issues not apparent at idle. - 9
Clean up and document the process
Return all removed components to their original positions, wipe away any oil or coolant spills, and store old plugs for disposal. Record the model, gap, torque, and timing notes for future reference.
Tip: Keep a digital or physical log of maintenance tasks to simplify future service.
FAQ
What engines use RJ19LM spark plugs?
RJ19LM is a commonly used plug in many small to mid-size engines and is compatible with several makes. Always verify the exact heat range, thread size, and seat type against your vehicle’s manual or the plug’s specification sheet.
RJ19LM is compatible with many engines; always verify heat range and size in the manual before installation.
Can I reuse old spark plug threads after removal?
No. Reusing threads can strip the cylinder head. If threads are damaged, repair or replace the head assembly. When in doubt, consult a professional or reference your vehicle’s service documentation.
Do not reuse damaged threads; avoid cross-threading when reinstalling plugs.
Should I use anti-seize on RJ19LM?
Anti-seize is optional and depends on manufacturer guidance. If used, apply a light coat on the threads only and avoid on the contact threads or insulator. Some engines don’t require it and may even be harmed by it.
Only apply anti-seize if the manual says so; otherwise, skip it.
What if I notice misfires after replacement?
Misfires can indicate incorrect gap, poor seating, damaged wires, or ignition coil issues. Recheck the gap, torque, and wiring connections, then test the engine again. If problems persist, seek professional diagnostics.
If misfires appear, recheck the installation steps and wiring connections.
How long do RJ19LM plugs last?
Plug life depends on engine type, operating conditions, and maintenance. Regular inspection and replacement at manufacturer-recommended intervals help prevent performance loss and misfires.
Life varies; follow service intervals and inspect plugs regularly.
Do I need a torque wrench for this job?
A torque wrench ensures the plug is seated correctly and prevents head damage from over-tightening. If you don’t have one, consult the manual for a safe hand-tight plus a small fraction twist guideline, but a torque wrench is preferred.
A torque wrench helps avoid under- or over-tightening.
Watch Video
Main Points
- Inspect plug wear before replacement
- Follow engine-specific torque specs
- Gap and seating are critical for ignition quality
- Label wires and protect from heat
- Document maintenance for future reference