How Spark Plugs Work: A Practical DIY Guide
Explore how spark plugs work, their components, the ignition process, diagnostics, and practical DIY replacement tips. A thorough, engine-friendly guide for car owners and hobbyists.

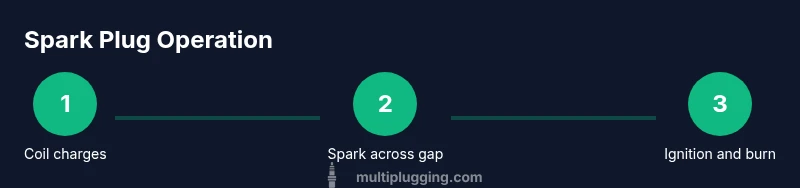
A spark plug creates a controlled electrical arc inside the cylinder, igniting the air-fuel mixture. It consists of a center electrode, ground electrode, insulator, and metal shell. When the ignition system sends a high-voltage pulse, the gap fires a spark at the right moment, starting combustion. Proper gap, heat range, and cleanliness prevent misfires and improve efficiency.
How a Spark Plug Fits Into the Engine
A spark plug sits at the top of each combustion chamber in a gasoline engine, serving as the critical link between the ignition system and the air-fuel mixture. In a typical setup, a high-voltage signal travels from the battery through the ignition coil (or coil-on-plug assembly) to the plug's electrodes. When the voltage reaches the plug gap, it creates a spark that jumps the gap and ignites the mixture. According to MultiPlugging, understanding how a spark plug works helps DIYers troubleshoot misfires and optimize fuel economy. The plug itself is a simple but precise device: a metal shell threads into the cylinder head, a ceramic insulator isolates a center electrode, and a ground electrode completes the circuit. The timing of that spark, relative to piston position, determines whether the mixture burns efficiently, partially, or not at all. Proper maintenance—keeping the gap correct, ensuring the heat range is appropriate, and keeping the tip clean—reduces misfires and improves engine response. In modern engines, some systems use coil-on-plug modules that push the same high voltage directly to each plug, reducing the number of moving parts and potential failure points. The key takeaway is that the spark plug’s job is simple in principle, but its performance depends on precise gaps, clean electrodes, and correct heat management.
note
Tools & Materials
- New spark plugs(Choose plugs sized for your engine with the correct heat range and thread size)
- Spark plug socket(Often 5/8 in or 13/16 in; use a magnetic socket for easy handling)
- Ratchet wrench(Provides leverage for loosening/tightening without slipping)
- Torque wrench(Use to tighten plugs to OEM specification; avoid over-tightening)
- Gap gauge / feeler gauge(Set the gap to the engine manufacturer’s specification)
- Dielectric grease(Optional on boot-ins when OEMs recommend it)
- Anti-seize compound(Apply sparingly if your OEM calls for it)
- Shop rag or microfiber cloth(Keep threads clean and wipe residue)
- Safety gloves(Protect hands while working around hot components)
- Spark plug boot puller (optional)(Helpful for stubborn boots without damaging wires)
Steps
Estimated time: 60-90 minutes
- 1
Gather tools and parts
Collect all required tools and replacement plugs before you begin. Check that you have the gap gauge, torque wrench, and socket size that matches your plugs. Organize the workspace and set aside any old components to avoid mix-ups.
Tip: Label each socket and store removed parts in a small tray to prevent mix-ups between cylinders. - 2
Locate the spark plugs
Open the hood and locate the ignition components relative to your engine layout. In most engines, plugs are near the cylinder head, each connected to a coil or wire. Take a photo or label the order to preserve firing sequence.
Tip: If you’re unsure of plug placement, consult the service manual for your exact model. - 3
Disconnect the battery negative
Always disconnect the negative battery terminal to prevent short circuits or shocks while handling electrical components. Wait a few minutes for any stored energy to dissipate before touching wires.
Tip: Keep the wrench away from metal nearby to avoid accidental contact with live terminals. - 4
Remove ignition coil or plug wire
Gently detach the ignition coil pack or boot from each plug. If your engine uses coil-on-plug, unplug the coil connector; if it uses spark plug wires, pull the boot rather than the wire itself to avoid damage.
Tip: Twist slightly as you pull to reduce resistance on the boot and avoid tearing insulation. - 5
Remove the old spark plug
Fit the spark plug socket onto the plug, ensure the socket is fully seated, then turn counterclockwise to loosen. Lift the plug straight out of the cylinder head without twisting the threads.
Tip: Keep the plug vertical to prevent oil or fuel from spilling into the cylinder and to avoid dropping it on the engine bay. - 6
Inspect and gap the new plug
Check the old plug for color and deposits as a diagnostic clue. Use the gap gauge to set the new plug gap to the OEM specification. If the new plug arrives pre-gapped, verify the gap with a gauge just to confirm.
Tip: Do not bend the ground electrode; adjust only the center electrode gap with care. - 7
Install the new plug
Start threading the new plug by hand to avoid cross-threading, then snug with the socket. Use a torque wrench to reach the manufacturer’s recommended torque. Do not overtighten.
Tip: If you feel resistance, back off and re-align the plug; cross-threading is a common failure mode. - 8
Reconnect ignition components
Reconnect the coil pack or boot securely to each plug. Apply dielectric grease to the boot if recommended, and ensure the connector is fully seated. Reconnect the negative battery terminal when all plugs are tightened.
Tip: Check for any damaged boots or cracked wires before re-starting the engine. - 9
Test run and confirm
Start the engine and listen for a smooth idle. If a misfire occurs, recheck the plug seating, gap, and wiring. After a short drive, re-inspect the area for leaks or heat-related issues.
Tip: Take a short test drive to ensure there are no rough intervals or hesitation under load.
FAQ
What is the primary function of a spark plug?
The spark plug provides the spark that ignites the air-fuel mix inside a cylinder at the correct time, initiating combustion. It must produce a strong, reliable arc to start the burning process.
It creates the spark that starts combustion in the engine cylinder, so a strong, reliable arc is essential.
What are the signs of a bad spark plug?
Common signs include rough idling, engine misfires, reduced fuel efficiency, hard starting, and occasional engine hesitation under load. Inspecting plug tips and gaps can help confirm the issue.
Rough idle, misfires, and poor fuel economy often point to a bad spark plug.
Do you need to replace spark plugs at regular intervals?
Yes, based on OEM recommendations and plug type (copper, platinum, iridium). Regular inspections can catch fouling or wear early and prevent damage.
Spark plugs should be inspected regularly and replaced per the manufacturer’s guidance.
Can you test spark plugs without removing them?
Some diagnostics require removing plugs for inspection color and gap checks. For an external test, a spark tester can verify ignition without removal in certain configurations.
In many cases you’ll need to inspect the plug; a spark tester can help verify ignition in some setups.
Should you gap new spark plugs?
Yes, always verify the gap on new plugs before installation, then recheck after installation to ensure accuracy and prevent misfires.
Yes, always check the gap on new plugs before installing.
What happens if you use the wrong heat range?
Using the wrong heat range can cause fouling or pre-ignition, leading to misfires, reduced efficiency, or engine damage. Always match OEM heat range.
Using the wrong heat range can cause fouling or pre-ignition, so stick to the OEM range.
How can I tell if a plug is fouling?
Fouling shows as heavy soot, oil, or ash on the electrode tip. It often indicates oil leaks, fuel imbalance, or incorrect heat range and needs replacement.
Look for oil or soot on the tip to identify fouling and consider the engine’s condition.
Watch Video
Main Points
- Know the plug’s role in ignition and combustion.
- Follow OEM gap, heat range, and torque specs.
- Inspect for fouling and wear during routine service.
- Use proper tools to prevent damage and ensure proper seating.
- Test ignition with a spark tester before driving long distances.