How to Check Spark Plugs: A Practical DIY Guide for DIYers
Learn how to check spark plugs with a clear, step-by-step approach. Discover tools, safety tips, and when to clean or replace to keep your engine running smoothly.

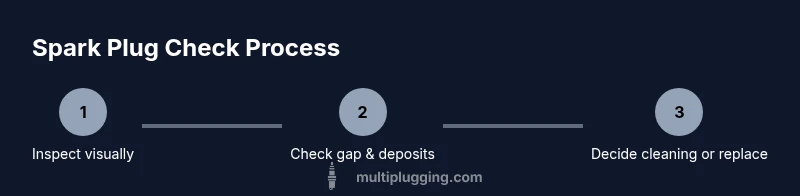
This guide shows you how to check spark plugs on most gasoline engines. It covers identifying worn electrodes, testing the gap, inspecting for deposits, and deciding whether cleaning or replacement is needed. Follow safe, tool-assisted steps to diagnose misfires and protect engine performance.
Why Checking Spark Plugs Matters
Understanding how to check spark plugs is a practical skill for any DIYer who cares about engine health. According to MultiPlugging, regular spark plug checks help you spot wear, fouling, and gaps that drift out of spec long before they cause noticeable symptoms. This guide focuses on the how-to rather than theory, giving you actionable steps to diagnose ignition problems, save money on unnecessary trips to the shop, and keep your car performing reliably. Whether you drive a modern fuel-injected sedan or a practical naturally aspirated pickup, the core idea is the same: the spark plug is the gatekeeper of ignition efficiency. If it isn’t delivering a consistent spark, your engine can misfire, lose power, or burn more fuel. By learning how to check spark plugs, you can quickly determine whether a plug should be cleaned, regapped, or replaced. Remember, every vehicle is a little different, so always cross-check with your owner’s manual for device-specific guidance. The MultiPlugging team emphasizes safety and methodical work, so you’ll avoid common mistakes and get a trustworthy read on plug condition.
In this guide you will learn the practical steps to inspect, measure, and decide the next best action for each plug. You’ll also gain tips for organizing the process, noting results, and planning your maintenance schedule to minimize surprise breakdowns. The overall goal is clear: keep the ignition system healthy and the engine running smoothly with minimal downtime.
Visual Clues: What You’re Looking For During a Visual Check
A quick visual inspection can tell you a lot about the engine’s health without needing advanced tools. When you learn how to check spark plugs, you’ll look for electrode wear, deposits, and the color of the ceramic insulator. Worn electrodes show widened gaps and reduced spark energy. Sooty, oily, or crusty deposits suggest fueling or oil control issues; burnt, blistered, or cracked insulators indicate a damaged plug that should be replaced. Color can be a clue: light tan or gray indicates healthy combustion, while black, sooty deposits often point to rich fuel conditions or misfiring. Hazy white deposits might reveal coolant intrusion or elevated engine temperatures. Always inspect plugs one at a time, return them to their correct cylinder, and avoid twisting or forcing the plug into the boot, which can damage the wire and coil pack. Beyond the plug itself, examine the spark plug boot for cracks or looseness, and verify the ignition coil or module connections are secure. A disciplined visual check helps you triage issues before you run the engine again.
Measuring Gap and Function Testing
The next phase of how to check spark plugs involves gap measurement and functional testing. Use a trusted feeler gauge or a dedicated gap tool to measure the gap between the center and ground electrodes. Compare your measurement to the vehicle manufacturer’s specified gap in the owner’s manual or a service database. If the gap is too wide, you’ll lose spark energy; if it’s too narrow, you may have slow ignition. If the gap is out of spec, you have two options: gently re-gap (if within your tool’s tolerance and you know the plug’s design allows it) or replace the plug. For many DIYers, the simplest and most reliable test is a spark tester. With the ignition system active, a good plug will emit a strong blue spark under compression, while a weak or intermittent spark suggests ignition or wiring issues elsewhere in the system. Remember to perform tests with a grounded setup and avoid touching metal components while the system is live. The MultiPlugging analysis, 2026, stresses the importance of verifying both spark quality and the physical condition of the plug to get a true read on engine health.
Tools & Materials
- Spark plug socket with extension(3/8 inch drive preferred; ensure you have a long socket to reach deep recessed plugs)
- Ratchet wrench(Stable, comfortable grip to prevent dropping the plug)
- Feeler gauge or gap tool(To measure electrode gap accurately)
- Torque wrench(Use manufacturer torque specs when reinstalling plugs)
- Dielectric grease(Light dab on the inside of the boot to improve grip and prevent moisture)
- Anti-seize compound(Follow vehicle manufacturer guidance; some plugs do not require it)
- Spark plug tester or spare battery for testing(Optional tool to verify spark before reinstalling)
- Shop towels and cleaning solvent(For cleaning threads and wipe-downs)
- Compressed air can or blower(To clear dust from plug wells before removal)
Steps
Estimated time: 45-75 minutes
- 1
Prepare workspace and safety
Park on a level surface, switch off the engine, and allow it to cool completely. Disconnect the negative battery to prevent accidental shocks from the ignition system. Gather all tools and materials, and wear eye protection. A clean workspace reduces the risk of dropping fasteners or contaminating the plug wells.
Tip: Double-check that the engine is cool before touching any components to avoid burns. - 2
Locate each spark plug
Open the hood and locate the spark plug wires or coil packs associated with each cylinder. For many inline engines, plugs sit in a row along the top or side of the engine, each paired with a boot. If you’re unsure, consult the service manual for the exact layout. Label or photo each boot position to prevent miswiring when reassembling.
Tip: Use a magnetic pick-up tool to avoid finger slips when removing stubborn boots. - 3
Remove one plug at a time
Gently twist to disconnect the plug boot with a rocking motion and slide out the plug using the spark plug socket. Do not forcibly pull on the wire. Remove the plug from its hole and place it in a clean tray to inspect.
Tip: Work one cylinder at a time to prevent cross-contamination and ensure correct reinstallation order. - 4
Inspect visually and measure gap
Hold the plug up to a good light and check the electrode wear, deposits, and insulator condition. Measure the gap with a feeler gauge and compare with the specification. If the gap appears off, adjust only if the plug design allows safe regulation; otherwise replace.
Tip: Wipe the plug threads clean before reinstallation to ensure proper seating. - 5
Decide cleaning or replacement
Based on your observations and the manufacturer guidance, decide whether to clean lightly fouled deposits or replace worn or damaged plugs. Use a gentle brush or solvent for light deposits; avoid harsh cleaning that can damage the ceramic.
Tip: If deposits are heavy or oil-fouled, replacement is usually the better option. - 6
Reinstall with correct torque
Apply a small amount of anti-seize if recommended by the vehicle maker and reinstall plugs in the same order. Tighten to the specified torque using a torque wrench, then reconnect the boot carefully. Do not over-tighten, which can strip threads.
Tip: Torque specs vary by plug type; always follow the car’s manual or service data. - 7
Test engine after completion
Reconnect the battery, start the engine, and listen for smooth operation. Check for any misfires or rough idle. If you still notice rough running, recheck the gaps, wires, and coils, or consult a professional.
Tip: If the engine runs poorly after replacement, check for crossed wires or damaged coil packs. - 8
Document results and schedule next check
Record the plug condition and any actions taken. Schedule your next spark plug inspection according to your vehicle’s maintenance plan, considering how you drive and fuel quality. A brief maintenance log helps you track wear patterns over time.
Tip: Keep a small notebook or digital log for intervals and outcomes.
FAQ
Is it necessary to remove the valve cover to check spark plugs?
For many engines you can access plugs without removing the valve cover, but some layouts do require extra disassembly. Always consult the service manual for your specific engine bay design.
Often you can access spark plugs without removing the valve cover, but some engines require more disassembly. Check your manual for your model.
Can spark plugs be cleaned instead of replaced?
Light fouling from fuel additives or temporary rich conditions can sometimes be cleaned. However, if deposits are heavy, oil-fouled, or the electrode is worn, replacement is the safer and more reliable option.
You can clean light fouling, but heavy deposits or wear usually mean replace the plug.
How often should spark plugs be checked?
Check spark plugs at the intervals recommended by your vehicle manufacturer. If you drive aggressively, use poor-quality fuel, or notice misfires, check sooner.
Follow your manual’s schedule; if you push the vehicle hard or notice misfires, inspect sooner.
What are signs of a bad spark plug in a running engine?
Symptoms include rough idle, misfires, hesitation during acceleration, reduced fuel economy, and difficulty starting. Visual signs include soot, oil on the tip, or cracked ceramic.
Rough idle, misfires, and poor fuel economy are common signs of a bad plug. Inspect visually for damage too.
What tools are essential for checking spark plugs at home?
A spark plug socket, ratchet, feeler gauge, and torque wrench are core. Depending on the vehicle, you may also need dielectric grease and anti-seize, plus a spark tester for live checks.
The basics are a plug socket, ratchet, gap tool, and torque wrench; add a tester if you have it.
Watch Video
Main Points
- Inspect plugs one at a time to avoid cross-contamination.
- Use the manufacturer gap spec; adjust or replace as needed.
- Clean only light deposits; replace if in doubt or damaged.
- Torque properly to avoid damaged threads or poor sealing.
- Document outcomes and schedule the next check.