Coil Pack & Spark Plugs: Diagnosis, Replacement, and Maintenance
A practical, step-by-step guide for diagnosing, replacing, and maintaining coil packs and spark plugs to keep ignition reliable and engines running smoothly. Learn symptoms, tools, torque basics, and testing techniques from the MultiPlugging team.

Coil packs and spark plugs work together to ignite the fuel in each cylinder. This guide covers how they interact, common symptoms of failure, and safe, DIY replacement steps. You’ll learn when to replace plugs versus the coil pack and how to verify a successful repair.
Understanding coil pack and spark plugs
Understanding how coil pack and spark plugs fit together is essential for diagnosing ignition problems. According to MultiPlugging, ignition starts in the battery and powers the high-voltage path to each cylinder; the spark plug then fires at the precise moment to ignite the air-fuel mixture. In many modern engines, a single coil pack powers multiple cylinders, while other designs place a dedicated coil directly over each plug. The coil pack stores energy and releases it as a sharp surge when the ignition control module signals the spark plug to fire. Spark plugs wear over time; electrode gaps widen and deposits form, making a strong spark harder to achieve. When either component begins to fail, you may notice rough idle, hesitation during acceleration, misfires, reduced fuel economy, or a Check Engine Light. Early diagnosis is easier when you know what to look for: misfires in a specific cylinder, inconsistent spark signals, or corroded connector pins. The MultiPlugging team emphasizes testing both coil packs and plugs when a misfire is suspected, because the root cause determines the repair approach and cost. A systematic diagnostic saves time and money and preserves engine performance.
Symptoms that point to ignition trouble
Rough idle, stalling, and unexpected engine hesitation are classic signs of ignition trouble. If only one cylinder misfires, you’ll often notice a temporary stumble during acceleration or a drop in smoothness at idle. A Check Engine Light with misfire codes commonly implicates the ignition system, but fuel delivery and sensors can mimic ignition issues too. Before replacing parts, confirm whether the issue is spark-related or coil-related by inspecting plug condition and testing the coil pack for proper resistance and voltage signals. Remember to consider environmental factors like oil leaks or fouling from bad fuel, which can masquerade as ignition faults. The goal is to isolate whether worn plugs or a weak coil pack are the primary culprits and then address the specific component.
Tools, safety, and prep
Preparation is key to a safe, effective ignition service. Work in a well-ventilated area away from open flames. Disconnect the negative battery cable to prevent shorts, and if your vehicle’s design requires, depressurize fuel lines as per the service manual. Wear safety glasses and mechanic gloves, and keep a clean workspace with clearly labeled parts. It’s prudent to review the owner’s manual for specific torque specs and replacement intervals, and to confirm whether your engine uses a single coil pack for several cylinders or individual coils per plug. The focus is on a clean, organized process that protects you and ensures reliable results.
Diagnostics: is it the coil pack or spark plugs?
Diagnosing ignition faults requires a methodical approach. Start by removing and inspecting the spark plugs for fouling, glazing, or electrode wear. If gaps are out of spec or the plugs show heavy wear, replace them and recheck performance. If plugs look okay but misfires persist, test the coil pack(s) for proper resistance and verify the wiring harness and connectors for corrosion or damage. In engines with shared or modular coil packs, a single bad coil can cause multiple cylinder misfires, so testing each unit is important. Use an OBD-II scanner to pull misfire codes and, if available, a handheld spark plug tester to isolate the faulty plug. Based on MultiPlugging analysis, ignition component wear is a frequent source of misfires, so don’t overlook the coil pack during evaluation.
Replacement considerations and basic replacement steps
If diagnostics indicate worn plugs, replace them with properly gapped units specified by your vehicle manufacturer. When a coil pack is suspected, verify compatibility with your engine and confirm you’re replacing the correct bank or module. For both plugs and coils, use the correct torque specs and whether anti-seize or dielectric grease is recommended by the manufacturer. Some engines require replacing plugs and coils together to restore balanced ignition and avoid future misfires. While replacing parts, keep track of which plug corresponds to which cylinder to avoid cross-wiring mistakes. The goal is to restore a consistent spark across all cylinders and finish with a clean reassembly.
Testing after replacement and validation
Reinstall all components, reconnect the wiring, and start the engine to listen for a smooth idle. If the engine runs roughly or you see ongoing misfires, recheck the connections and verify the spark plug gaps. Clear any stored fault codes with a scanner and run a road test to confirm normal operation under load. If trouble persists, repeat diagnostics with a focus on ignition signals and resistance across the coil packs. The objective is a stable idle, confident acceleration, and no stored diagnostic codes.
Maintenance best practices for coil pack and spark plugs
Prevention is cheaper than repair, so schedule regular inspections of ignition components and keep spark plug gaps within manufacturer tolerance. Use high-quality spark plugs that match your engine’s heat range and electrical requirements. Apply dielectric grease where recommended on connector terminals, and avoid overtightening plugs, which can damage threads and cause leaks. For engines with coil packs, inspect connectors for corrosion and ensure the pack is firmly mounted to minimize vibration. Keeping fuel quality high and addressing oil leaks promptly also protects ignition components from fouling and contamination.
Tools & Materials
- Socket set with spark plug socket (typically 5/8" or 16 mm)(Include extension bar and universal joint if needed for hard-to-reach plugs)
- Torque wrench(Use manufacturer torque specs for plugs; avoid over-tightening)
- Ratchet, metric wrenches(For removing coil pack mounting bolts and disconnects)
- Spark plug gaps tool or feeler gauge(Check and adjust gap to OEM spec before installation)
- Dielectric grease(Used on ignition coil connectors if recommended by manual)
- Anti-seize compound(Optional; use only if recommended by manufacturer)
- Replacement spark plugs and, if needed, proper coil pack(Select based on engine type and heat range)
- Electrical contact cleaner(Clean connector pins and ignition coil terminals)
- Safety gear (gloves, glasses)(Protect hands and eyes during work)
- Torque seal or threadlocker (manufacturer-approved)(Only if specified by OEM guidance)
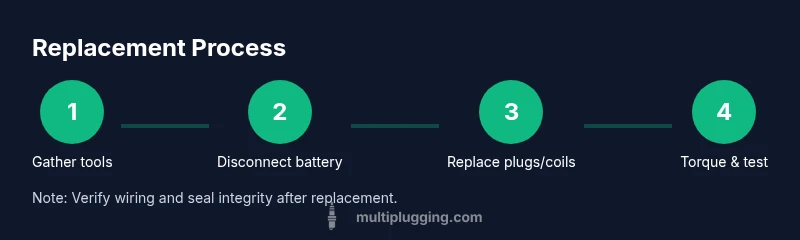
Steps
Estimated time: 60-90 minutes
- 1
Gather tools and safety gear
Collect all required tools and safety equipment, then review the vehicle’s service manual for any model-specific notes. This step ensures you have everything on hand before starting and reduces mid-project interruptions.
Tip: Lay out tools in the order you’ll use them to speed up the job. - 2
Disconnect the negative battery
Loosen and remove the negative battery cable to prevent electrical shorts while you work on ignition components. This simple safety step reduces the risk of arcing or accidental starts during the procedure.
Tip: If the battery is hard to access, disconnect the fuses corresponding to the ignition circuit as a precaution. - 3
Locate ignition components
Identify the coil pack or coils and the spark plugs. Note the arrangement for engines with a shared coil pack and verify you’re working on the correct bank if applicable.
Tip: Refer to the service manual illustrations or a repair guide for exact locations. - 4
Remove old plugs and coil pack
Carefully disconnect spark plug wires or boot connectors, then remove the spark plugs and any mounting bolts for the coil pack. Avoid yanking wires to prevent damage to connectors.
Tip: Twist gently while pulling to release stubborn boots without damaging the wire. - 5
Inspect and prepare replacement parts
Check new plugs for the correct heat range and ensure they are properly gapped. If replacing coils, inspect the mounting surfaces for corrosion or oil leaks and prepare them for installation.
Tip: Keep used parts organized so you don’t confuse cylinder locations. - 6
Install parts and test
Install the new plugs with proper torque, reinstall the coil pack, reconnect wiring, and restore the battery connection. Start the engine and listen for a smooth idle; run the engine under load to confirm no misfires.
Tip: If the engine doesn’t start, recheck wiring connections and ensure the coil pack is seated properly.
FAQ
How do I tell if my issue is caused by the spark plugs or the coil pack?
Start with a visual inspection of the plugs for fouling and wear. If plugs look fine, test the coil pack for proper resistance and verify connections. If you still have symptoms, consider replacing both as a preventive approach. Use diagnostic tools to isolate the fault before purchasing parts.
Inspect the plugs first, test the coil packs, and then decide which parts to replace based on diagnostic results.
Is it safe to drive a car with a suspected misfire?
A mild misfire may not immediately damage the engine, but driving with a misfire can cause catalytic converter damage and increased emissions. Limit driving, especially under heavy load, and diagnose the ignition issue promptly.
Driving with a misfire can hurt your exhaust system and fuel economy, so get it checked soon.
Should I replace spark plugs when I replace the coil pack?
In many cases, replacing spark plugs when you service the coil pack helps restore ignition balance across cylinders and reduces the likelihood of repeated failures. Verify supplier recommendations and heat range compatibility for your engine.
If you’re already in there, it’s often a good idea to swap the plugs too, to prevent future misfires.
What torque specs should I use for spark plugs?
Torque specs vary by engine and plug type. Always refer to the manufacturer’s service manual or a trusted repair guide for the exact torque value and thread sealing guidance. Over-tightening can damage threads, while under-tightening can cause leaks.
Check the manual for the correct torque and follow it precisely.
Can I reuse old ignition coils?
Reusing ignition coils is possible in some cases, but it’s common to replace coils if you’ve already opened the system or if symptoms persist after plug replacement. Coil reliability varies by design and mileage, so evaluate resistance and heating during testing.
Coils wear out with time, so consider replacing them if the problem continues after plugs.
Should I use anti-seize or dielectric grease during installation?
Only apply anti-seize or dielectric grease if the vehicle’s service manual calls for it. Misuse can affect torque accuracy or electrical contact. When in doubt, follow OEM guidance to avoid unwarranted issues.
Follow the manual on whether to use anti-seize or dielectric grease.
Watch Video
Main Points
- Check ignition components for wear before symptoms appear.
- Use the correct torque specs and plug gaps to avoid future misfires.
- Test and diagnose both plugs and coils to identify the true culprit.
- Document maintenance for future DIY reference.