Spark Plug Automotive Guide: Diagnose, Replace & Optimize
Learn how to diagnose worn spark plugs, safely replace them, and verify engine performance with practical steps, tool lists, and safety tips from MultiPlugging.

Goal: Diagnose worn spark plugs, safely remove and replace them, and verify engine performance after service. This quick guide outlines the steps, essential tools, and safety tips for spark plug automotive maintenance so DIY enthusiasts can improve throttle response, fuel efficiency, and reliability without guesswork.
Understanding Spark Plug Basics and Why They Fail
Spark plugs are the tiny ignition devices that start the combustion process in your engine. In the context of spark plug automotive systems, a healthy plug creates a strong, consistent spark and efficiently transfers heat away from the tip. Over time, plugs wear, deposits form, and gaps drift, which can lead to misfires, rough idling, or reduced fuel economy. According to MultiPlugging, the most common failure modes are fouling from oil or fuel, carbon buildup, and electrode wear. By understanding how plugs work and what failure looks like, you’ll diagnose problems faster and decide whether you should clean, gap, or replace. This foundational knowledge is essential for any DIYer tackling basic maintenance in 2026 and beyond.
If you skip this step, you may miss early signs of trouble, resulting in worse efficiency or engine damage. Being able to identify fouling, oil burning, or worn electrodes helps you choose the right course of action—cleaning, gap adjustment, or full replacement. The spark plug automotive ecosystem includes different materials (copper, platinum, iridium) and heat ranges; understanding these options prepares you to make an informed choice that fits your vehicle’s design and driving style.
Tools & Materials
- Spark plug socket wrench(8mm or 5/8-inch drive; use a swivel extension if space is tight)
- Torque wrench(For final plug torque per manufacturer specifications)
- Spark plugs (correct heat range and type)(Check manual for your engine’s recommended heat range and electrode material)
- Gap tool or feeler gauge(Verify and adjust the electrode gap to the manufacturer spec)
- Anti-seize compound(Only apply if the vehicle manual recommends it; many modern engines don’t require it on spark plugs)
- Dielectric grease(Use on coil boots to improve connection and water resistance)
- Shop rag or lint-free cloth(Keep the area clean and remove debris from around the plug well)
- Safety gear(Gloves and safety glasses to protect hands and eyes during replacement)
- Owner’s manual / vehicle service information(Always reference vehicle-specific instructions)
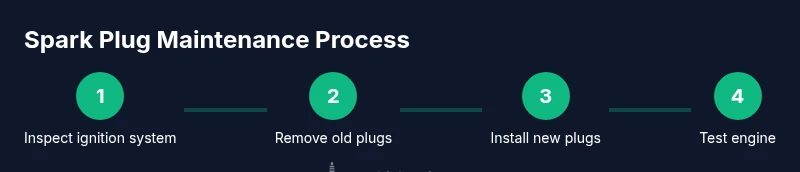
Steps
Estimated time: Estimated total time: 45-60 minutes
- 1
Prepare and secure the vehicle
Park on a flat surface, engage the parking brake, and disconnect the negative battery terminal to reduce the risk of shock or short circuits. Allow the engine to cool before touching any components near the firing area. Gather your tools and ensure the work area is well-lit and ventilated.
Tip: Cooling before starting is crucial to avoid burns and to make coil wires easier to handle. - 2
Access the spark plugs
Remove any covers or intake components blocking access to the spark plug wells. Gently disconnect the coil packs or ignition wires one at a time, labeling them if needed to keep track of order. Keep track of which plug corresponds to which cylinder.
Tip: Taking photos or labeling wires helps avoid miswiring during reassembly. - 3
Inspect the old plugs
Carefully unthread and remove the old plugs. Inspect for fouling, oil deposits, heavy carbon buildup, or worn electrodes. Document your observations with a quick note or photo to guide future decisions on replacement vs. cleaning.
Tip: Oil fouling suggests an engine issue beyond plugs; consider diagnosing valve seals or piston rings if oil is present. - 4
Check and adjust the gap
Measure the gap with a gap tool to ensure it matches your vehicle’s specification. If the gap is out of spec, adjust carefully by bending the ground electrode or replace the plug if adjustment isn’t feasible.
Tip: Never force the plug into the thread; misthreading can damage the cylinder head. - 5
Install new plugs
Thread plugs in by hand to avoid cross-threading, then snug with a torque wrench to the manufacturer’s recommended spec. Reinstall any removed covers or ignition components, ensuring a clean seal.
Tip: Use light rotational pressure with a feel to avoid overtightening. - 6
Test the engine and wrap up
Reconnect the battery, start the engine, and listen for a smooth idle and steady running. Check for misfires or a check-engine light and address any irregularities promptly.
Tip: If you hear a missed beat or misfire, recheck the plug type, gap, and wiring to isolate the issue.
FAQ
What is a spark plug and what does it do?
A spark plug creates the electric spark that ignites the air-fuel mixture in the engine’s combustion chamber. This ignition starts the power stroke and drives engine performance.
Spark plugs generate the spark that starts the combustion process in your engine, triggering power.
How can I tell if my spark plugs are worn?
Common signs include rough idle, misfires, reduced fuel economy, slower acceleration, and difficulty starting the engine. Visual wear or heavy deposits also indicate replacement is due.
If your car idles rough or misfires, your plugs may be worn and should be checked.
Can I clean old spark plugs instead of replacing them?
Cleaning may provide a temporary fix, but worn or fouled plugs should be replaced to restore reliability and performance.
Cleaning can be a temporary fix, but replacement is usually necessary for reliable operation.
Should I use anti-seize on spark plugs?
Only apply anti-seize if the manufacturer recommends it for your engine; many modern engines do not require it and applying it can affect torque.
Check your manual—some engines don’t need anti-seize on spark plugs.
What tools do I need to replace spark plugs?
A spark plug socket, a gap tool, a torque wrench, some anti-seize if advised, and basic safety gear will cover most replacement tasks.
You’ll need a spark plug socket, a gap tool, and a torque wrench to replace plugs safely.
Watch Video
Main Points
- Inspect plugs to catch wear and deposits early
- Use manufacturer-specified heat range and gap
- Handle ignition components with care to avoid cross-threading
- Recheck engine after replacement for smooth performance