Do You Need to Adjust Spark Plug Gap? A DIY Practical Guide
Learn whether you should adjust spark plug gap, how to measure it accurately, and safe DIY steps for diagnosing and tuning engine ignition.

The spark plug gap is a small, critical distance that influences ignition timing and combustion efficiency. In most cars, new plugs arrive pre-gapped to OEM specs and do not require adjustment. However, wear, deposits, or modifications can drift the gap; verify the gap with a feeler gauge against the manufacturer spec before installation. If out of spec, adjust or replace with properly gapped plugs.
Why spark plug gap matters
The gap between the center and ground electrodes on a spark plug sets the spark energy delivered to the air-fuel mixture. A correct gap ensures reliable ignition, efficient combustion, smooth idling, and optimal fuel economy. Even a small deviation can cause misfires, rough running, or reduced performance under load. According to MultiPlugging, understanding how the gap affects ignition helps you troubleshoot issues early and avoid unnecessary plug replacements. The gap also interacts with ignition coil output, plug design, and engine knock characteristics, making it a central variable in both diagnostics and maintenance. For most DIYers, this is a straightforward check, but the consequences of getting it wrong are real—rough starts, hesitations, or poor acceleration can stem from a drifted gap. Treat the gap with respect, and your engine will respond with better efficiency and reliability.
Do you need to adjust gap on new plugs?
New spark plugs in most modern engines come pre-gapped to OEM specifications. In typical daily-drivin g, you should not re-gap fresh plugs unless the vehicle manual or plug packaging explicitly instructs you to. There are exceptions: high-performance or modified engines may require a different gap range, and some heat-range combinations can drift slightly during burn-in. Always verify the specific gap value printed on the packaging or in the owner's manual before installation. The MultiPlugging team emphasizes that verification is a quick precaution that saves trouble later, especially on engines with precise ignition timing.
Reading factory specs and tolerances
Factory gap specs live in your owner’s manual, on the plug packaging, or in the vehicle service information. The goal is to stay within the specified tolerance; small deviations may be acceptable in rare cases, but large drift usually indicates wear or fouling. If you cannot locate a numeric gap, use the exact model number and consult the manufacturer’s official data. In many cases, a gap within the specified range yields the best balance of combustion efficiency and spark plug life. The MultiPlugging analysis highlights that sticking to the manufacturer’s gap spec is the safest path for most engines, especially for daily drivers and non-turbo, naturally aspirated setups.
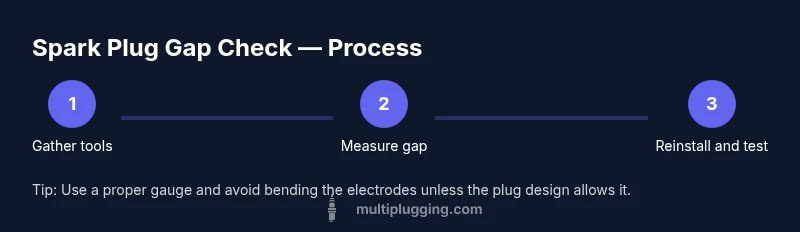
Tools, safety, and setup
Before touching plugs, gather the right tools and wear basic safety gear. A clean workspace, eye protection, and a magnet helps recover dropped plugs. Use a proper socket and extension to avoid dropping the plug into the engine bay, which can cause costly damage. Anti-seize compound is optional for some plug types but can help when re-installing, especially in aluminum heads. Ensure the engine is cool before starting to prevent heat-related burns or damaged threads. The goal is to minimize tool slip and avoid bending electrodes, which can permanently alter the gap.
How to measure the gap accurately
To measure gap accurately, remove the spark plug so you can inspect it closely. Use a calibrated feeler gauge or a dedicated gap tool that matches the plug’s design. Slide the gauge into the gap without forcing; a proper fit should offer slight resistance. Compare the measured gap to the manufacturer’s spec. If the plug is used, ensure you clean the electrodes and inspect for wear or deposits that can falsely indicate a misgap. Document your measurement and keep track of which plug was measured to avoid confusion during reinstallation.
How to adjust gap correctly
If the measured gap is out of spec, adjust with the appropriate method for your plug type. Some plugs are designed to be re-gapped using a precision feeler gauge and careful bending of the outer electrode. Others are factory-sealed and must be replaced if the gap is not within tolerance. Do not force an adjustment beyond what the plug’s design allows, and never use aggressive tools that could crack or fracture the ceramic insulator. After adjusting, re-measure to confirm the gap is within spec. For many drivers, substitutions and adjusting gaps should be followed by a test run to ensure smooth idle and acceleration.
Reinstalling and testing the engine
Reinstall the plug with the correct torque specification to protect threads and ensure a reliable seal. Reconnect ignition coils or boots and any related timing sensors. Start the engine and listen for a smooth idle; a misfire or rough start can indicate the gap drift is still present in one or more plugs. If you changed multiple plugs, run the engine at operating temperature and check for any abnormal performance like hesitation under load. Document results and revisit the gap if misfires or roughness persist.
Gap considerations by engine type and plug design
Not all engines respond the same to gap changes. Iridium or platinum plugs can be more resilient to minor misgap, while copper-core plugs depend more on accurate gap settings for peak performance. High-performance engines or turbocharged setups often require tighter or wider gaps, depending on the ignition system and compression ratio. Always start from the manufacturer’s recommended gap and adjust only if you are confident in how your engine behaves with the new gap. When in doubt, consult the service manual or a professional.
Common mistakes and misconceptions
A frequent error is assuming new plugs are guaranteed to be exactly pre-gapped; some plugs arrive with a default gap that must be verified. Another mistake is bending the center electrode without following the plug’s design guidelines, which can create micro-fractures or altered heat range. Reusing old plugs after re-gap can also lead to inconsistent results if the electrode shape has degraded. Finally, neglecting to torque plugs to spec can cause vibration and leakage, negating the benefits of proper gap.
Maintenance habits to prevent drift
Set a schedule to check plug gaps during routine maintenance, especially after replacing ignition coils or fastening new leads. Keep a log of gap measurements and plug models to help diagnose misfires or fuel economy changes. Use a clean, organized workspace and return tools to their place after use to avoid misplacements. Regular checks help catch gradual gap drift due to deposits or wear before it affects performance.
The practical takeaway for DIYers
For most DIYers, the key takeaway is simple: verify the gap against the exact spec before installation, and re-check after installation if you suspect misfires or rough running. If you know your engine runs a specific gap due to performance modifications, adjust accordingly and test the outcome with a short drive. Always follow safety precautions and torque specs, and replace worn or damaged plugs rather than chasing an arbitrary gap value.
Tools & Materials
- Feeler gauge set(Range should cover the expected gap spectrum (e.g., 0.02–1.0 mm). Use metric or imperial units as per the plug spec.)
- Spark plug socket with extension and ratchet(Keep a magnetic pickup handy to retrieve dropped plugs.)
- Torque wrench(Refer to vehicle spec for torque value, typically in the 7–25 Nm range depending on head type.)
- Anti-seize compound (optional)(Only if recommended by plug manufacturer.)
- Safety glasses(Protect eyes from debris and metal shavings.)
- Cool engine surface (gloves optional)(Avoid burns when handling tools and plugs.)
- Replacement spark plugs (if needed)(Use the exact part number recommended by the maker.)
- Magnetic pickup tool (optional)(Helpful for retrieving dropped plugs.)
- Clean, lint-free rag(Wipe deposits from plug seats before reinstall.)
Steps
Estimated time: 30-60 minutes
- 1
Gather tools and prepare work area
Collect all tools and safety gear, ensure the vehicle is off, cooled, and parked on a level surface. Clear space around the engine bay to avoid losing small parts.
Tip: Double-check torque specs before removing any plugs to prevent thread damage. - 2
Identify ignition system and plug positions
Use the service manual or engine diagram to locate the correct spark plug positions. Label or photograph each plug location to avoid mix-ups.
Tip: Label keeps you from reinstalling plugs in the wrong cylinder, which can cause cross-firing misfires. - 3
Disconnect and remove spark plug boot/wire
Carefully detach the ignition coil boot or spark plug wire without pulling on the wire itself. Wiggle gently to break the seal.
Tip: If the boot sticks, twist slightly while pulling straight outward to avoid wire damage. - 4
Inspect and remove the plug
Threaded plugs should be removed with a proper socket; inspect for fouling, oil, or cracks. Use a magnet to lift the plug if it falls into the engine bay.
Tip: Do not drop the plug; dropping can chip the insulator and ruin the plug. - 5
Check gap with feeler gauge
Place the gauge between the center and ground electrodes. Confirm whether the gap matches the manufacturer’s spec.
Tip: Use a stable, straight-on approach to avoid bending the electrodes while measuring. - 6
Adjust gap if necessary
If the gap is out of spec, adjust using the correct method for your plug type. Re-measure after any adjustment.
Tip: Do not force adjustments beyond the plug’s design; some plugs should be replaced instead of re-gapped. - 7
Reinstall the plug and torque to spec
Apply a small amount of anti-seize if recommended, thread the plug by hand, and tighten with torque wrench to the manufacturer spec.
Tip: Over-tightening can strip threads, under-tightening can cause poor sealing. - 8
Reconnect boot/wire and re-check
Reattach the boot and ensure it seats firmly. Recheck the gap on any re-used plugs if necessary.
Tip: Verify cylinder order after reinstall to ensure correct firing sequence. - 9
Test engine and observe performance
Start the engine and listen for a smooth idle. Take a short test drive to assess acceleration and response.
Tip: If rough running persists, re-check the gap on all plugs and inspect ignition components.
FAQ
Do I always need to adjust the gap when replacing plugs?
Not usually. Most plugs arrive pre-gapped to OEM specs. Only adjust if the manual or plug packaging instructs it or if you’re chasing a specific performance outcome.
Usually you don’t need to adjust the gap when replacing plugs. Check the manual, and adjust only if necessary.
How do I know what gap to set?
Consult the vehicle’s owner manual or the plug packaging for the exact gap in inches or millimeters. If in doubt, err on the side of the manufacturer’s spec.
Check the manual or packaging for the exact gap, and follow that spec.
What happens if the gap is too wide or too narrow?
Gaps that are too wide can cause misfires and weak ignition; gaps that are too narrow can cause excessive current draw and overheating. Either situation can reduce performance and fuel efficiency.
Too wide may cause misfires; too narrow can overheat the plug. Either way, performance suffers.
Can I use a digital feeler gauge safely?
Yes. A digital feeler gauge can improve readability and accuracy, especially for small gaps. Ensure you zero the gauge and use the correct units.
A digital gauge can help, just make sure you zero it and use the right units.
Should I gap pre-gapped plugs?
If the plug is designed to be pre-gapped, only re-gap if the manufacturer approves it. For most plugs, it’s safer to replace rather than re-gap.
Only re-gap if approved by the manufacturer; otherwise, replace with a correctly gapped plug.
Is it safe to reuse old plugs after gap adjustment?
Reusing old plugs after adjustment is risky if the electrodes have worn or damaged. Inspect for cracks, buildup, or signs of wear before deciding.
Inspect thoroughly; don’t reuse worn or damaged plugs after any adjustment.
Watch Video
Main Points
- Verify gap against spec before installation.
- Measure with the correct gauge after removing the plug.
- Reinstall with proper torque to avoid thread damage.
- Replace worn or damaged plugs rather than forcing a re-gap.